Send
Close Add comments:
(status displays here)
Got it! This site "www.robinsnyder.com" uses cookies. You consent to this by clicking on "Got it!" or by continuing to use this website. Note: This appears on each machine/browser from which this site is accessed.
Penrose steps: how it is done
1. Penrose steps: how it is done
1. Penrose steps 1
2. Penrose steps 2
3. Penrose steps 3
4. Penrose steps 4
5. Penrose steps 5
6. Penrose steps 6
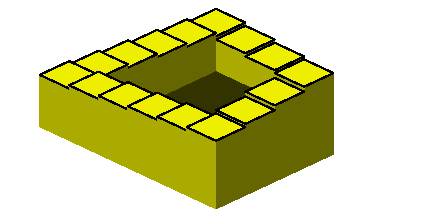
The Penrose never-ending steps illusion, also called the stairs illusion, cannot exist in reality as depicted.
How is the Penrose steps illusion created?
2. Escher
These steps were made famous by
M. C. Escher (graphic artist) as elaborations on the theme.
3. Historical note
The steps illusion was created by Oscar Reutersvärd in 1937 and independently discovered and made popular by Lionel Penrose, the father of
Roger Penrose (mathematical physicist) .
4. Grid

Start with a grid. In this case, a 6 by 6 grid with corner cells shown for perspective.
5. Steps

Now add steps around the edge cells of the grid, starting it the front bottom and increasing going counter-clockwise around and back to the front bottom.
6. Remove steps

Now remove some of the lower steps not needed for the illusion. Steps are now added to complete the illusion.
7. Add illusion steps

Now add some illusion steps, shown in blue.
8. Last step

Now replace the rightmost step with one with a height that matches.
9. Remove the base

Finally, remove the base where it should not be and the grid lines to make the illusion more convincing.
Note that the illusion requires that the sides on the right (or left) have fewer steps than the sides on the left (or right).
That is one way to create the Penrose steps illusion.
10. End of page

 Now add steps around the edge cells of the grid, starting it the front bottom and increasing going counter-clockwise around and back to the front bottom.
 Now remove some of the lower steps not needed for the illusion. Steps are now added to complete the illusion.
 Finally, remove the base where it should not be and the grid lines to make the illusion more convincing.